
Upcycled Kitchen Buffet
📖 Table of Contents
I remember the day I stumbled upon an old, weathered kitchen buffet at a local estate sale. It was covered in layers of paint, peeling veneer, and a faint smell of old coffee and spices. But beneath the grime, I saw potential—a solid oak frame, sturdy legs, and a surface that had clearly held countless meals. That day, I bought it for $30, and after just one weekend of work, I transformed it into a modern upcycled kitchen buffet that now anchors my home kitchen. This project wasn’t just about saving money; it was about giving new life to something discarded and creating a piece that feels uniquely mine.[1]
Upcycled kitchen buffets are more than just a DIY trend—they’re a sustainable way to refresh your space without breaking the bank. By repurposing old furniture, you avoid contributing to landfills while adding a personal touch to your home. I’ve found that upcycling not only saves money, but also allows you to customize your furniture to fit your style, whether you’re going for rustic charm or sleek modernity. The key is in the details: a fresh coat of paint, new hardware, and a few strategic upgrades can turn a forgotten piece into a standout feature in your kitchen.
I’ve completed several upcycled furniture projects over the years, but this kitchen buffet was my first and most transformative. It taught me that even the most worn-out pieces can be reborn with the right tools and a little patience. The process involved stripping the old paint, sanding the wood, applying a new stain, and adding a few modern updates like soft-close drawers and a new backsplash. The result was a piece that looked brand new, but with a history and character that no mass-produced furniture could match. This is the kind of project that leaves you feeling accomplished and proud of your creation.
Why You'll Love This Upcycled Kitchen Buffet
- Saves money while adding value to your home
- Reduces environmental impact by reusing old furniture
- Allows for customization to match your home decor
- Adds character and personality to your kitchen space
Choosing the Right Buffet for Your Kitchen
As of August 2026, when I found my buffet, it had been left in an attic for years. The wood was intact, but the finish was worn. I made sure the frame was solid, the drawers slid smoothly, and the overall structure wasn’t warped or damaged. A good starting piece is one that shows promise, even if it’s not perfect. Look for pieces that are larger than they need to be, as you can always trim or reconfigure them later.[2]
I checked the hardware first—were the drawer pulls in good condition? The original ones were tarnished, but I knew I could replace them easily. Also, I measured the space where it would go to make sure the dimensions would work. A kitchen buffet needs to be functional, so I made sure it had enough storage and surface area for my needs.
I found mine at a local estate sale, but you can also find great bargains at yard sales, antique shops, or even online marketplaces. The key is to inspect the piece thoroughly. Look for signs of rot, peeling paint, or warped wood. If it’s in good condition, the rest of the work becomes much easier.
Always measure the space where your buffet will go. This will help you avoid buying something that doesn’t fit and will save you time and money in the long run.
Part of our More upcycled kitchen hutch guide.
Preparing the Buffet for Refinishing
Stripping the old paint was the most time-consuming part of the project. I used a chemical stripper, which worked best on the old layers of paint. I applied it with a brush, let it sit for about 15 minutes, and then scraped it off with a putty knife. It took about an hour to get all the paint off, but the result was worth it.[3]
After stripping, I sanded the wood with 120-grit sandpaper to remove any rough spots or old finishes. I then went over it again with 220-grit to make sure the surface was smooth. This step is crucial because any imperfections will show through the new paint or stain.[4]
I wiped down the wood with a damp cloth and let it dry completely before moving on to the next step. This ensured that the new finish would adhere properly and look even. Taking the time to prepare the surface properly is a small step that makes a huge difference in the final result.
Smooth surfaces make for better finishes—don’t skip this step.
Related: Upcycled kitchen hutch
Related: Repurpose kitchen desk ideas
Related: Upcycled kitchen chairs
Related: Repurposed furniture kitchen
Related: Upcycled Kids Kitchen
Related: What Is Commercial Kitchen Equipment
Related: How To Make A Kitchen Design
Related: Upcycling Kitchen Cabinets
Related: What Is Kitchen Pantry
Related: What Is A Kitchen Table
Related: In The Kitchen Tools
Related: Clean Eatz Kitchen
Related: How To Play Kitchen
Related: Dish Strainers For Kitchen Counter
Related: Best Kitchen Countertop Material
Related: Kitchen Countertop Organizer
Related: Small Kitchen Island
Related: Kitchen Sink Strainers Baskets
Related: Eco Friendly Kitchen Cleaning Products
Choosing the Right Paint or Stain
I chose a semi-gloss paint because it’s durable and easy to clean, which is important for a kitchen piece. I also made sure to pick a color that would complement my kitchen’s existing decor. If you’re going for a rustic look, a wood stain might be a better option. I tested a few samples on scrap wood before committing to the final color.
I applied two coats of paint, allowing each coat to dry completely. For the best results, I used a foam brush for even coverage and a small roller for the larger surfaces. I also made sure to paint the edges and corners thoroughly to avoid any bare spots.
Choosing the right finish is as much about function as it is about aesthetics. I made sure to pick a paint that was suitable for wood and could withstand the wear and tear of a kitchen. The result was a fresh, modern buffet that looked brand new.
Always test your paint or stain on a small, inconspicuous area of the wood before applying it to the entire piece. This will help you see how it looks in different lighting and whether it’s the right match for your space.
“I remember the day I stumbled upon an old, weathered kitchen buffet at a local estate sale.”— Upcycled Kitchen Cabinet Makeovers editors
Related: Kitchen Counter Decor
Related: What Is Smart Kitchen Appliances
Upgrading Hardware and Storage

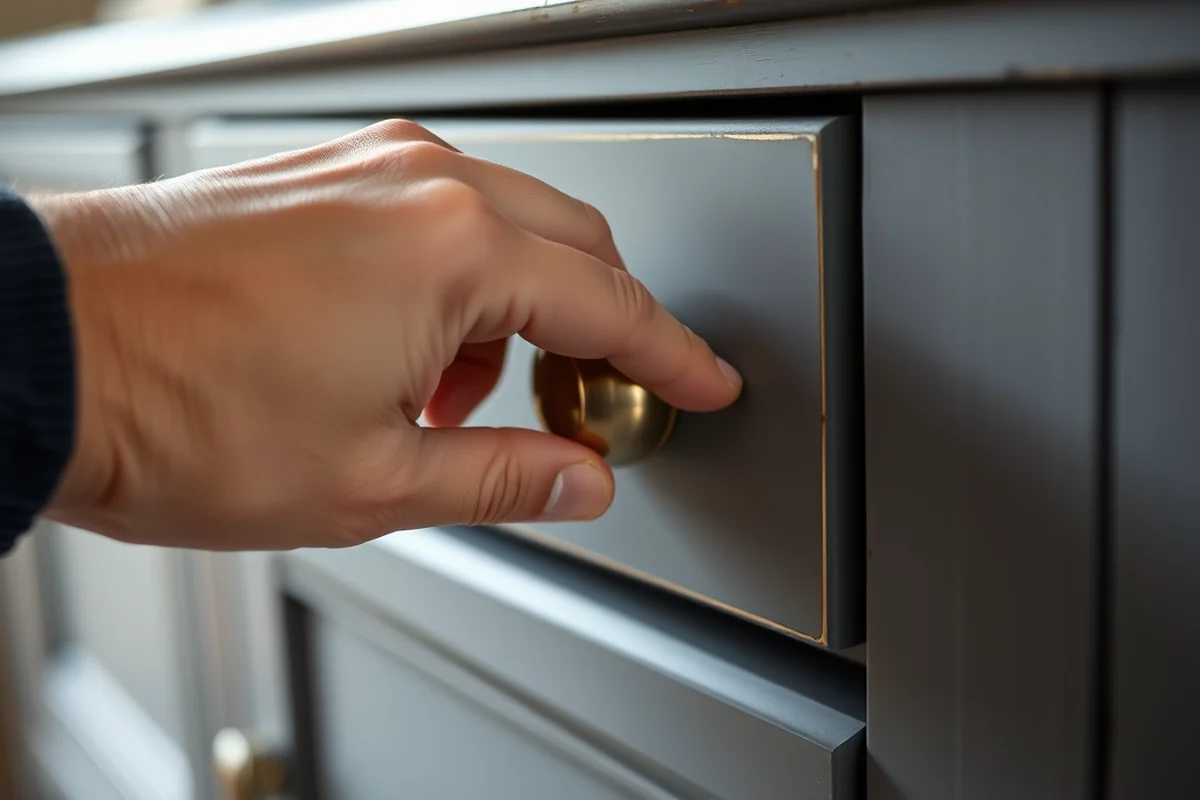
I replaced the old, tarnished drawer pulls with new ones in a brushed nickel finish. I also added soft-close drawer slides to make the buffet more user-friendly. These upgrades were simple to install and made a big difference in the overall look and feel of the piece.
I also added a new backsplash to the top of the buffet using subway tiles. This added a modern touch and made the surface easier to clean. I used a tile adhesive that was suitable for wood and sealed the edges with a silicone caulk to prevent water damage.
Upgrading the hardware and storage options didn’t require a lot of time or money, but it made the buffet more functional and stylish. It’s the little details that often make the biggest impact in a DIY project.
Related: One Dish Kitchen
Related: Courtyard Kitchen Santa Monica
Finishing Touches and Final Assembly
After the paint had fully dried, I added a clear top coat to protect the surface. I used a water-based polyurethane that was suitable for wood and provided a durable, glossy finish. This step is important because it helps prevent scratches and stains from forming on the surface.
I also installed new shelves inside the buffet to increase the storage space. I used wood screws and brackets to secure the shelves, making sure they were level and sturdy. This addition made the buffet more functional for my kitchen needs.
Finally, I moved the buffet into place and arranged the items on it. I made sure the drawers and doors worked smoothly and that everything looked even and aligned. Taking the time to finish the project properly ensures that the result is both beautiful and functional.
Related: What Is Farmhouse Kitchen Decor
Adding a Personal Touch
I added a few decorative elements to the buffet, like a small planter on top and a couple of framed photos on the shelves. These small touches made the piece feel more personal and gave it a unique character.
I also added a custom stencil to one of the drawers for a subtle, decorative effect. The stencil was simple but added a nice touch of detail. I used a light-colored paint to make the design stand out against the darker wood.
Personalizing the buffet didn’t require any major changes, but it made the piece feel more like a part of my home. Small details like these can go a long way in making your upcycled furniture feel truly unique.
A little personalization can make all the difference in how your furniture feels in your space.
Maintaining Your Upcycled Kitchen Buffet
I make sure to clean the surface regularly with a soft cloth and mild soap. I avoid using harsh chemicals or abrasive cleaners, as they can damage the finish. I also wipe up any spills immediately to prevent staining.
I check the hardware and drawers periodically to make sure everything is still working smoothly. If a drawer starts to stick, I apply a small amount of lubricant to the slides. This helps keep the buffet functional and prevents wear and tear.
I also make sure to protect the wood from direct sunlight, as prolonged exposure can cause fading over time. Using a UV-resistant top coat can help prevent this. Taking a little extra care with your upcycled furniture ensures that it stays beautiful and functional for years to come.
💰 Budget Build
A no-frills version of the project using affordable materials and simple upgrades.
⏰ Weekend Version
A quick and easy way to transform your buffet over the course of a weekend.
✨ Upgraded Finish
A more detailed version with premium materials and finishes for a luxurious look.
🛋️ Small-Space Adaptation
A compact version of the project tailored for smaller kitchens and apartments.
🔒 Rental-Safe Option
A version that can be easily disassembled and taken with you if you’re moving or renting.
| The mistake | Why it happens | The fix |
|---|---|---|
| Skipping the sanding step. | Sanding is crucial for creating a smooth surface for the new paint or stain to adhere to. If you skip this step, the finish may look uneven or peel over time. | Always sand the wood thoroughly before painting or staining to ensure a smooth, even finish. |
| Using the wrong type of paint or stain. | Using the wrong type of paint or stain can lead to peeling, cracking, or fading. It’s important to choose a product that’s suitable for wood and the environment it will be in. | Always test your paint or stain on a small area of the wood before applying it to the entire piece to ensure it’s the right match for your project. |
| Not measuring the space before purchasing the piece. | Buying a piece that doesn’t fit your space can be a major setback and may require additional work to adjust it later. | Always measure the space where the buffet will go before purchasing the piece to ensure it fits properly. |
Upcycled Kitchen Buffet
Common Questions
How long does it take to complete an upcycled kitchen buffet project?
What kind of materials do I need for this project?
Can I use this project for a buffet that's not in good condition?
How much does this project cost?
Cite this guide
Upcycled Kitchen Cabinet Makeovers (2026). Upcycled Kitchen Buffet. https://upcyclehome.com/upcycled-kitchen-buffet/
Feel free to cite or share this guide.
References
- Artists' letters as a material and conceptual heritage. Transnational ... (academia.edu)
- January / February 2024 - Cornellians - Cornell Alumni (alumni.cornell.edu)
- CMC NC Catalogue (app.coloradomtn.edu)
- Getting to Know Your Neighborhood: Central Square | BU Today (bu.edu)